Recodes
Recodes allow you to redefine ("re-code") fields. For example:
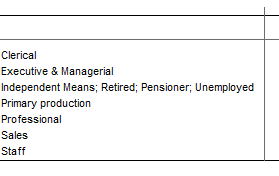
You have a field called Occupation, but are only interested in values for certain specific occupations.
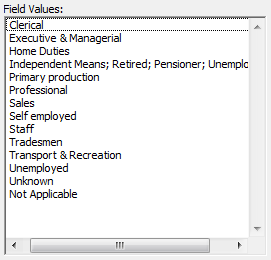
Recodes allow you to redefine the field so that only the occupations you are interested in are included in your table:
You have a field called Age, with values for all the ages from 0 - 100.
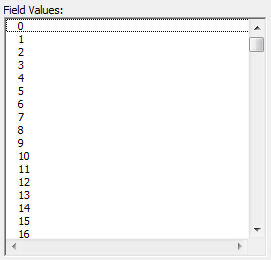
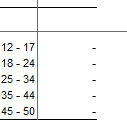
You can use a recode to do things like:
- Group some of those ages together into ranges (e.g. 18-24, 25-34, etc).
- Exclude age ranges that you are not interested in.
You have a field called Area, which contains a hierarchy of states, regions, suburbs and post codes.
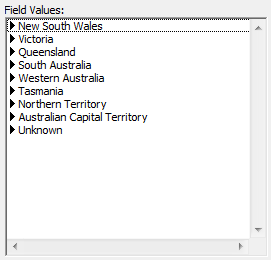
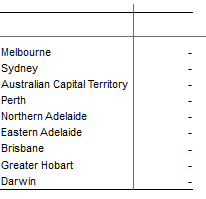
You are interested in a mixture of values from different levels of this hierarchy. You can create a recode that contains any combination of values from anywhere in the hierarchy.
Define a Recode
To define a recode, go to the Fields window and either:
- Double-click the field you want to recode; or
- Click once to select the field and then click Recode.
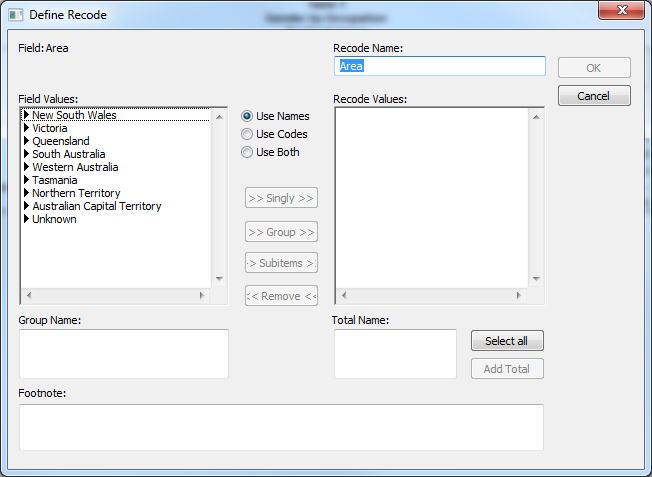
SuperCROSS displays the Define Recode window:
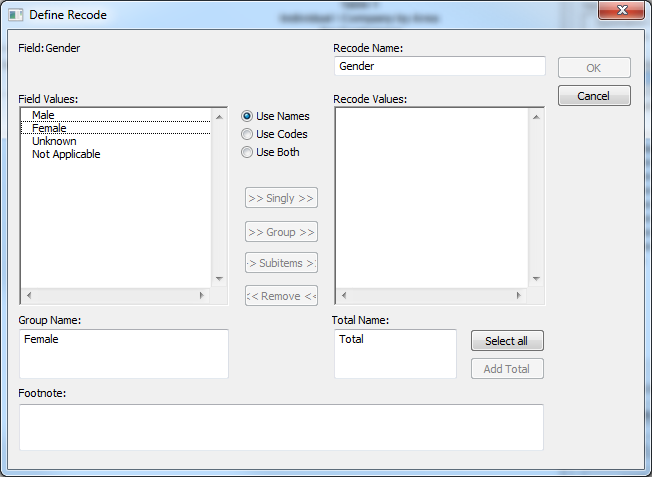
Use the buttons (>> Singly >>, >> Group >> and >> Subitems >>) to move values from the Field Values list to the Recode Values list. Only the Recode Values will be displayed when you use the recode in a cross tabulation.
The following examples explain this in more detail. All these examples use the sample Retail Banking database, but you can use any database to try creating recodes.
Example 1 - Recode a Field using a Subset of the Field Values
Suppose you have a field where you are only interested in a subset of the available values. For example, the Retail Banking database has a field called Marital Status, which has values for Single, Married, Divorced, Unknown and Not Applicable.
Let's assume we are not interested in the values for Unknown and Not Applicable, so we want to recode the field to exclude those values.
Go to the Fields window and double-click Marital Status. The Define Recode window displays.
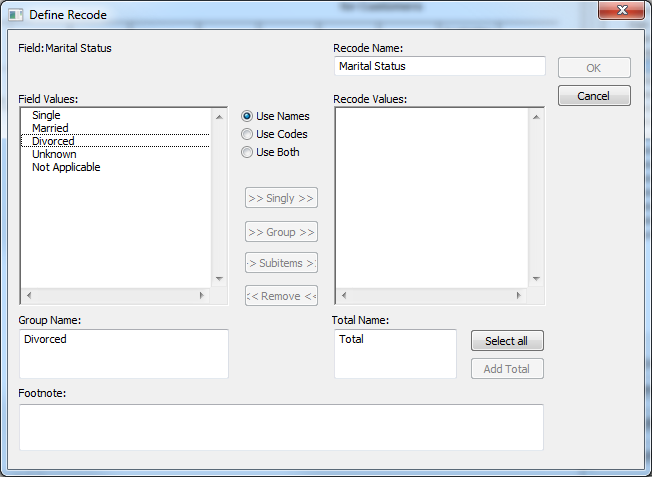
In the Field Values list, select the values we are interested in (in this case, Single, Married and Divorced).
To select multiple values, either:
- Select the values individually, by holding down Ctrl and clicking on each one.
- Select a range by holding down Shift, clicking the first value, and then clicking the last value.
- Click >> Singly >>. SuperCROSS moves the values to the Recode Values list.
Click OK.
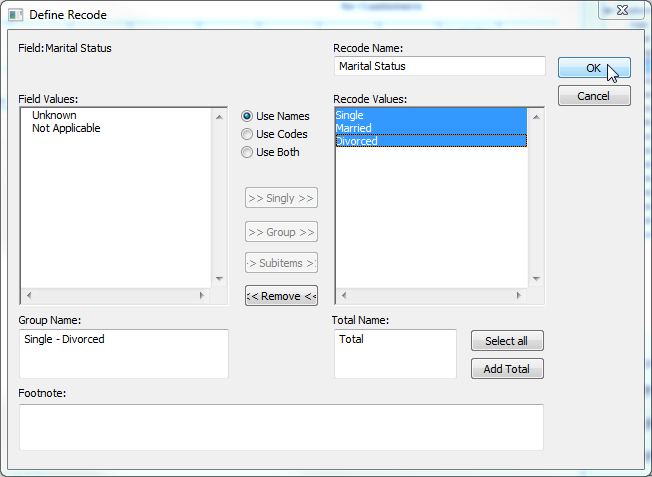
SuperCROSS recodes the Marital Status field so that it only contains the values we are interested in.
Drag the field onto a table to see it in action:

Example 2 - Recode a Field using Groups
Now let's assume we want to change Marital Status so that all unmarried values are grouped together.
- Go to the Fields window and double-click Marital Status. The Define Recode window displays, showing the recode we just defined.
- In the Recode Values list, use Ctrl-Click to select just Single and Divorced.
Click << Remove <<.
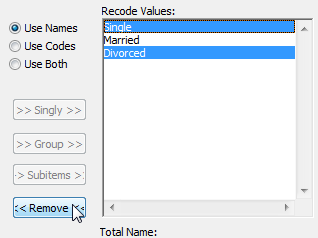
SuperCROSS moves them back to the Field Values list, leaving just Married in the Recode Values list. We need to do this first so that we can add them back into the recode as a group.
In the Field Values list, use Ctrl-Click to select both Single and Divorced.
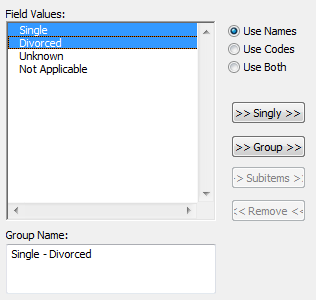
When you select the items, the Group Name field changes to show Single - Divorced. SuperCROSS has automatically generated this name based on your selection. If you add them as a group, then this will be the name used for the group.
You will typically want to change the group name to something that is meaningful to you.
- In the Group Name field, change the value to Not Married.
Click >> Group >>. SuperCROSS adds the new Not Married group to the Recode Values list.
You must set the Group Name before you click >> Group >>.
If you forget to do this, or you want to change the group name, you have to remove the group from the Recode Values list, change the Group Name, and then add the group back again.
Click OK.
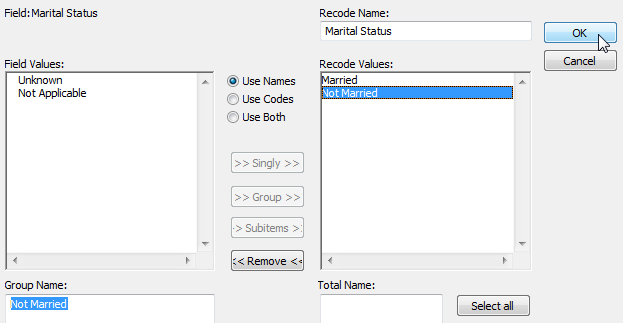
If the field you recoded already exists in a table, then the table automatically updates to show the updated recode:

Example 3 - Create Multiple Recodes for a Single Field
The previous examples demonstrated how to recode an existing field and then modify the recode. You can also create new recoded fields:
- Go to the Fields window and double-click Marital Status. The Define Recode window displays, showing the recode we defined in the previous example.
- In the Recode Name field, enter a new name.
Make changes to the recode if necessary, and click OK.
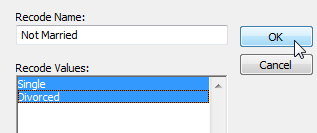
SuperCROSS defines a new recode field and adds it to the Fields list beneath the field it is based on:
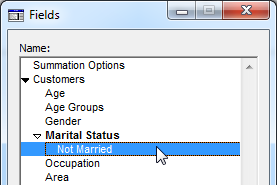
You can use this technique to create as many new recode fields as you like.
Note that:
- If you open the Define Recode window from a standard field (as in this example, where we started with the Marital Status field), and change the Recode Name, then SuperCROSS creates a new recode field with that name.
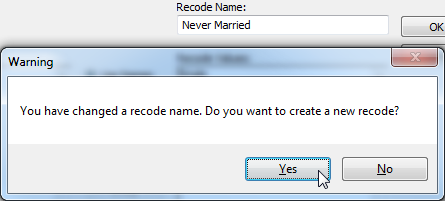
- If you open the Define Recode window from a recode field (e.g. in this example if you now double-click Not Married) and change the Recode Name, then SuperCROSS prompts you to choose what you want to do:
- Choose Yes to create a new recode field.
Choose No to redefine and rename the recode field you opened.
Example 4 - Recode a Hierarchical Field
You can also recode hierarchical fields. For example, the Area field from the sample Retail Banking database has values at four hierarchical levels: State, Region, Suburb, and Post Code.
When you are working with a hierarchical field, click the arrows next to the Field Values to expand and collapse the hierarchy:
You create the recode in the same way as a standard field, but you also have the option of using the >> Subitems >> button to add all of the sub items at a particular level in the hierarchy.
For example:
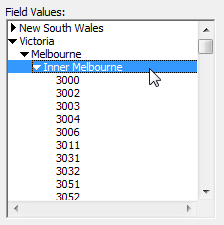
Click the arrows to expand Victoria > Melbourne > Inner Melbourne.
You can see that below Inner Melbourne are the post codes at the lowest level of the hierarchy.
Click Inner Melbourne to select it.
Click >> Subitems >>.
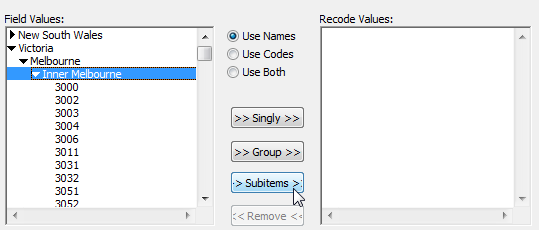
SuperCROSS adds all the sub items below the selected level to the Recode Values list:
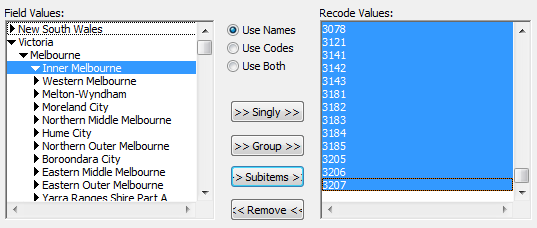
In the above example, SuperCROSS adds only the post codes that are under Inner Melbourne in the hierarchy. What if you wanted to add all the post codes for the whole of Victoria, or the entire country? You can also use the >> Subitems >> button to do this.
- In the Field Values list, select an item at a higher level in the hierarchy. For example, select Victoria.
Click >> Subitems >>. SuperCROSS displays a choice:
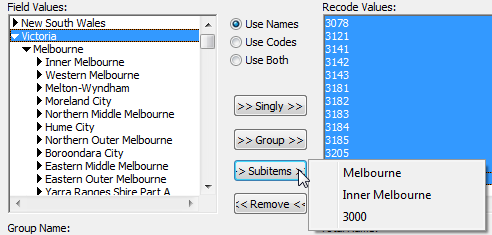
These options in the menu are the first item from each level in the hierarchy:
- Select Melbourne to add all the regions (e.g. in this case Melbourne, Barwon, Western District, etc)
- Select Inner Melbourne to add all the suburbs (e.g. in this case Inner Melbourne, Western Melbourne, etc)
- Select 3000 to add all the post codes (e.g. 3000, 3002, 3003, etc)
There is a difference between:
- Selecting Inner Melbourne and clicking >> Subitems >>. This adds only the post codes that are under Inner Melbourne in the hierarchy.
- Selecting Victoria, clicking >> Subitems >> and selecting 3000. This adds all the post codes from the lowest level in the hierarchy (i.e. not just the ones under Inner Melbourne, but also the ones from Western Melbourne, Melton-Wyndham, etc).
Recode a Hierarchy with Multiple Levels and Headings
Another option for recoding a hierarchy is to add multiple levels of the hierarchy with subheadings at each level of the hierarchy. For example:
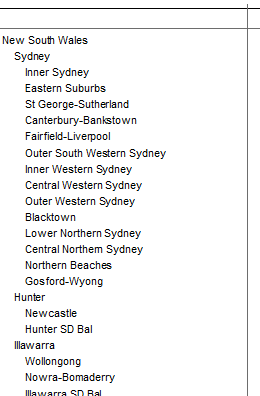
SuperCROSS can create this structure automatically:
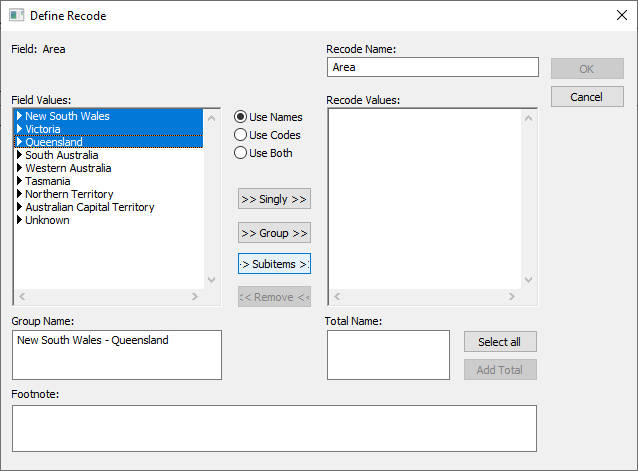
- In the Field Values list, select all the items you want to include at the highest level in the hierarchy that you want to include in the table. For example:
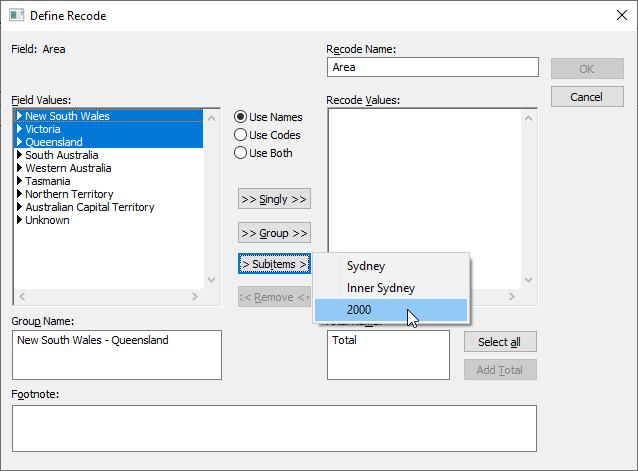
- Click > > Subitems >>, then hold down Ctrl and select the lowest level you want in the table:
SuperCROSS adds the items to the Recode Values, nesting the lower-level items inside their parent items.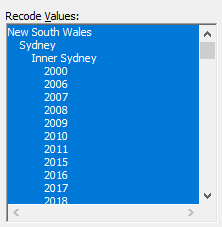
- Make any other required changes to the recode, and then click OK to create it.
Example 5 - Add Footnotes
You can also use recodes to add explanatory footnotes to your tables. Simply type your footnote text into the Footnote field:
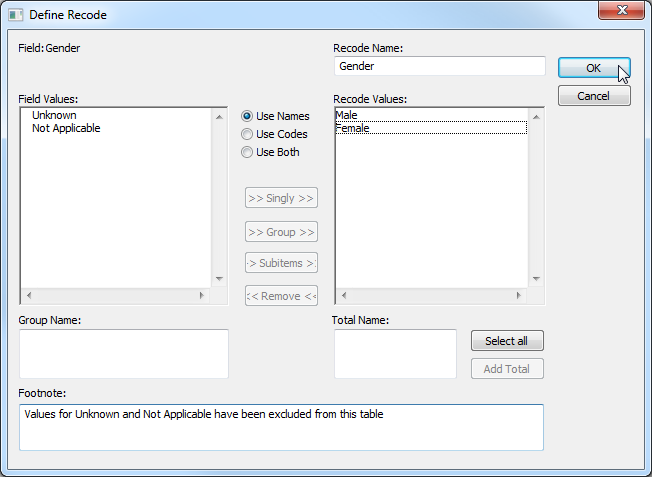
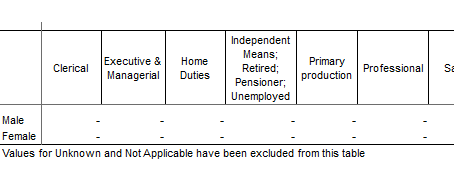
The footnote will be displayed at the bottom of the table whenever that recode appears in the table:
Example 6 - Totals
You can also use the recodes to add totals.
- Open the Define Recode window and create your recode.
- In the Recode Values list, select the items you want to create a total for. You can click Select All to select everything in the Recode Values list.
- In the Total Name field, enter a name for the total, or leave this set to the default (Total).
Click Add Total.
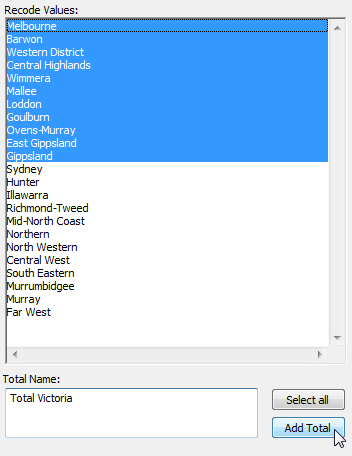
You can add multiple totals if necessary. For example:
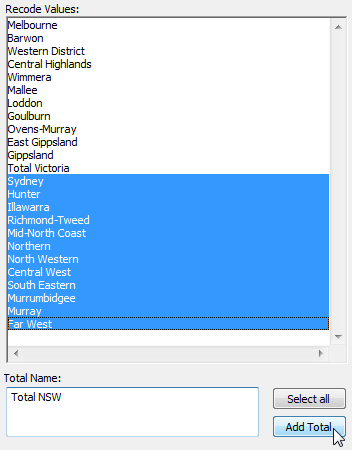
- If you have more than one total in a recode, then each total must have a unique name.
- You cannot create a total that includes another total.
- It is also possible to add column and row totals to a table automatically. Any recode totals are obviously not counted as part of these totals.
Learn More...
This section has introduced the concept of recodes and explained how to create them.
- You can also recode a summation option. Learn more...
- You can save and reload recodes.
- For further information about recodes, refer to the recode reference.
