Setup Static Metadata Pages
You can add metadata about datasets, tables, and fields within tables to SuperWEB2. Once the metadata is set up, end users can click the links in the SuperWEB2 interface to read the additional information about the data they are working with.
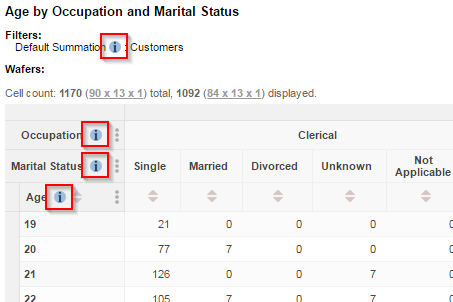
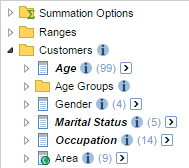
Metadata links can be displayed in SuperWEB2's Table View alongside fields that have been added to the table. The links are denoted by the info icon:


This page describes how to set up metadata for SuperWEB2 using static HTML pages.
It is also possible to store metadata in a database, instead of using static HTML pages. See Setup a Metadata Database for more information.
To set up static HTML metadata you need to complete the following steps:
Step 1 - Create Directory Structure for Metadata Files
Create a directory to store the metadata files.
This directory can be anywhere on the server file system, but is best located within the Tomcat context for the SuperWEB2 application. For example, you might create <tomcat_home>\webapps\webapi\metadata
Within this directory, create a sub-directory for each dataset, with the same name as the dataset ID.
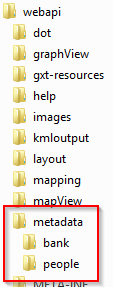
For example, if you have dataset called Retail Banking, with the ID bank and one called People with the ID people, you would create the following directories:

You can find out the ID of a dataset by logging into SuperADMIN and typing the command cat databases
Step 2 - Build HTML Files for Each Metadata Link
Create an HTML file for each metadata link and save it to the directory structure you created in the previous step, using a filename that matches the element name. Replace any spaces in the element name with a + symbol in the filename of the HTML page.
For example:
| Dataset ID | Element Name | Required File Location |
|---|---|---|
| bank | (metadata file for the whole dataset) | <tomcat_home>\webapps\webapi\metadata\bank\bank.html |
| bank | Age | <tomcat_home>\webapps\webapi\metadata\bank\Age.html |
| bank | Marital Status | <tomcat_home>\webapps\webapi\metadata\bank\Marital+Status.html |
| people | (metadata file for the whole dataset) | <tomcat_home>\webapps\webapi\metadata\people\people.html |
| people | Gender | <tomcat_home>\webapps\webapi\metadata\people\Gender.html |
The HTML file can use any valid HTML construct, including images and external link references.
If you need to display characters such as £ or €, make sure you save the HTML file in UTF-8 format.
Multilingual Datasets
If you have multilingual datasets, then you will need to create a page for each translated element name. This allows you to provide metadata that matches the language used in the dataset.
For example:
| Dataset ID | Element Name | Required File Location |
|---|---|---|
| bank | État Civil | <tomcat_home>\webapps\webapi\metadata\bank\État+civil.html |
| bank | 婚姻状况 | <tomcat_home>\webapps\webapi\metadata\bank\婚姻状况.html |
If your translated table IDs contain non ASCII characters (characters that are not part of the English alphabet), then you must ensure that your Tomcat server is configured to use UTF-8 encoding for URIs.
If you do not configure Tomcat correctly then metadata URLs containing non ASCII characters will not work.
This setting is not enabled by default. To make the change:
- Open <tomcat_home>\conf\server.xml in a text editor.
Locate the following section:
XML<Connector port="8080" protocol="HTTP/1.1" connectionTimeout="20000" redirectPort="8443" />Add
URIEncoding="UTF-8"to the Connector:XML<Connector port="8080" protocol="HTTP/1.1" connectionTimeout="20000" redirectPort="8443" URIEncoding="UTF-8" />- Save your changes and restart the Tomcat service.
Important: Make Sure You Create an HTML file for Every Field
You must create an HTML page for every field (in every dataset language if applicable) even if there is no information for some fields. This page could simply advise that no metadata is available.
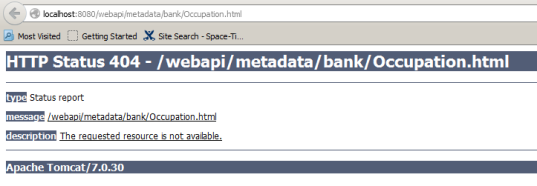
Once you have enabled metadata on the server, if there is no matching HTML page located in the metadata directory for a particular field, then clicking the metadata link will show a default Tomcat error page:

Step 3 - Configure SuperWEB2 to Link to the HTML Files
The final step is to configure SuperWEB2 to link to the HTML files. To make this change, you need to update a setting in the SuperWEB2 configuration.properties file:
- Open <tomcat_home>\webapps\webapi\WEB-INF\classes\configuration.properties in a text editor.
Locate the following section:
CODE# String. Default null. # URL path to SuperWEB2 metadata externalLink.metaInfoBaseURL=/webapi/jsf/help/not-configured.xhtmlChange it to:
CODE# String. Default null. # URL path to SuperWEB2 metadata externalLink.metaInfoBaseURL=/webapi/jsf/help/metadataRedirect.html- Save your changes and restart Tomcat or the SuperWEB2 service.
Please note that by default, the metadata redirection page assumes that you have saved the metadata HTML files to <tomcat_home>\webapps\webapi\metadata\ as described above. If you have saved your files to a different location, you will need to change a setting in the metadataRedirect.html file. Open the file in a text editor and locate the following code:
// Change this line to the base url of your metadata
    var metadataBaseUrl = "/webapi/metadata/";
Change the value of the variable to the root location of your HTML metadata files.
Step 4 - Configure Metadata Icons
The final step is to enable the metadata icons. Follow the steps to configure SuperWEB2 to display the metadata icons.

