Derivations
Derivations allow you to create new calculated items within a table. For example, you can add together values in other columns, or use mathematical and statistical functions.
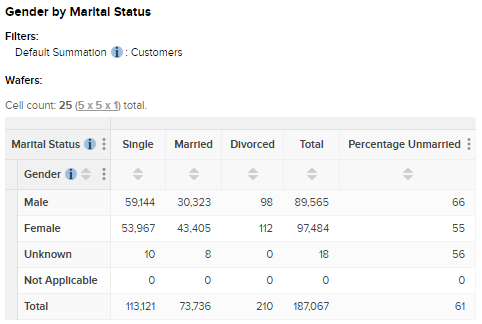
For example, in the following table a derivation has been added to calculate the total number of customers who are not married (the total number of Single and Divorced customers):
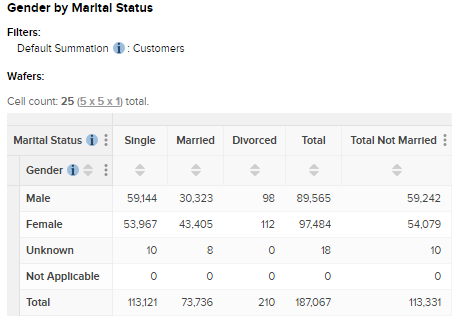
Derivations are saved if you save the table in SuperWEB2, and will remain in the table as long as you do not remove the field they are derived from, or change the set of field values from the derived field that are in the table. For example, the above derivation for Marital Status would automatically be removed if you removed the field value Married from the table or added the field value Unknown to this field.
Changes to other fields do not affect derivations (for example adding or remove field values from Gender would not affect the derivation on Marital Status). You can also move the derived field to a different axis without losing your derivations.
Create a Derivation
To create a derivation, click the menu option in the table next to the name of the field, and select the Add Derivation option:

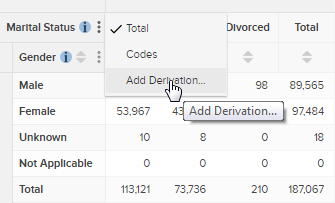
Your administrator can choose whether to enable derivations. If you do not see the Add Derivation option, then this indicates that you administrator has disabled derivations.
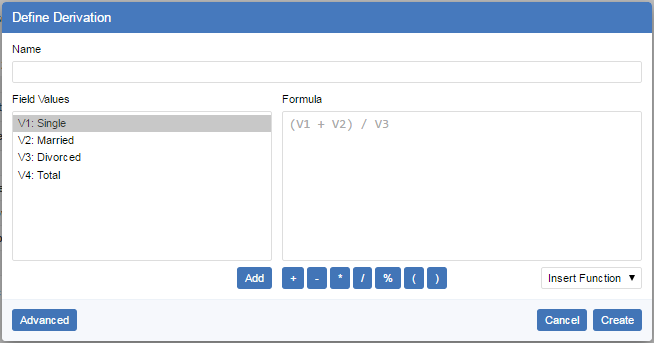
The Define Derivation dialog displays:
To create the derivation:
- In the Name field, enter a name for the derivation. This name will be displayed in the table.
- Use the Formula field to enter your formula.
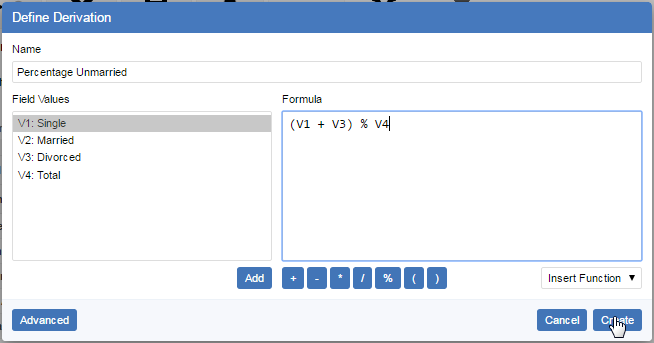
- You can either type the formula in manually, or use the buttons, drop-down list of functions and the Field Values list to select and add field items and mathematical and statistical functions.
- You can double-click a field value in the list to add it to the formula. Alternatively, select one or more field items (hold down Shift or Ctrl to make multiple selections) and use the Add button (this will add the sum of the selected field items to the formula).
- To refer to a field value in your formula, you must use the value codes (in this example, the code V1 represents Single, V2 represents Married, and so on).
- To add one of the functions, you can either type it manually into the formula, or select from the drop-down list as follows (see below for a description of the available functions):
- In the Field Values list, select the item or items you want to use with the function.
- Select the function from the drop-down list. Some of the functions take one field value as an argument, while others take two or more; some of the functions will be greyed out if the number of selected items does not match the number of arguments they take.
- Click Add.
- When you have finished creating your formula, click Create to add it to your table.
For example:
Derivation Functions
In addition to the mathematical operators (such as +, -, * and /) you can also use some functions in your derivations:
Exp | Exponential function. For example: Exp(V1) | ||||||
|---|---|---|---|---|---|---|---|
Sqrt | Square root. For example: Sqrt(V1) | ||||||
Round | Rounds to 0 decimal places. For example: Round(V1) | ||||||
Ln | Logarithm function. For example: Ln(V1) | ||||||
Sum |
The sum of a range of field values. For example: | ||||||
Forecast |
A forecast of a future or past value. The forecast is based on a trendcast algorithm that uses linear regression to extrapolate forwards and backwards. The function takes 2 arguments, separated by a semi-colon:
For example:
|
Decimal Values in Formulas
If your derivation formulas include numbers then you may need to use a decimal point (.) as the decimal mark when writing the formula, even if this is not the decimal separator for your locale, unless your administrator has enabled a particular setting in the SuperWEB2 configuration.
If the setting is not enabled, SuperWEB2 will display an error similar to the following:
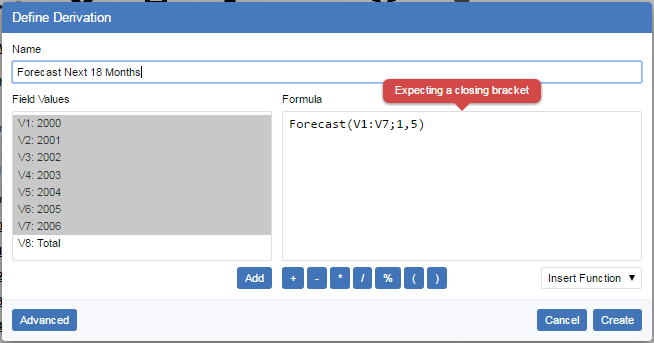
To save the formula, you will need to modify the value to 1.5:

However, if your administrator has enabled it, then you will be able to use either . or , as the decimal separator.
Edit a Derivation
If you want to make changes to a derivation after you have created it, click the menu next to the item in the table and select Edit Derivation.
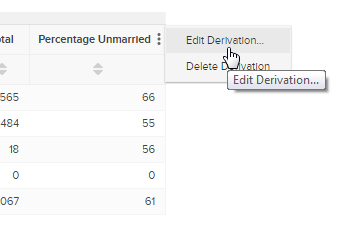
SuperWEB2 displays the Define Derivation dialog, where you can make changes. When you have finished, click Save to apply the changes and save your updates to the table.
Create/Edit a Derivation: Advanced Options
When you are creating or editing a derivation, you can click the Advanced option at the bottom of the Define Derivation dialog to access some advanced options:
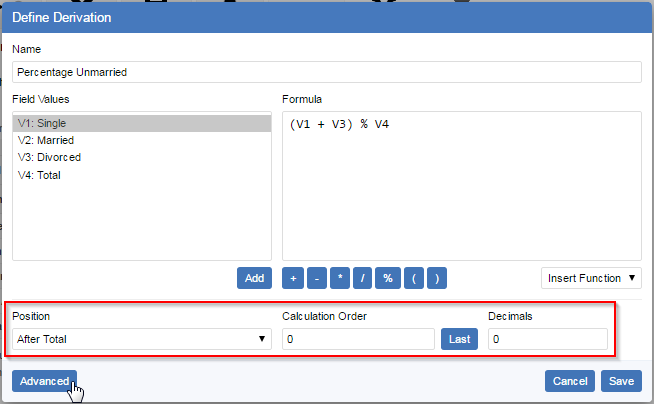
The advanced options are as follows:
| Position |
The position of the derivation within the table. By default, derivations are added as the last item in the row or column. Select an option from the drop-down list to move the derivation to either the start, end or after a specific field value. |
|---|---|
| Calculation Order |
Set the order of evaluation for the derivation. This can be important if you have multiple derivations in a table (for example, if you have derivations in both rows and columns, what should SuperWEB2 display in the cell where the two derivations intersect?). It can also be important if you are calculating percentages of fields and using totals. Fields with a lower number are evaluated first. Either enter a number or click Last to set the derivation to be evaluated last out of all currently defined derivations (when you click Last, SuperWEB2 populates the Calculation Order field with an evaluation number that is higher than any other currently defined derivation). |
| Decimals | Enter the number of decimal places to display for this derivation. |
Delete a Derivation
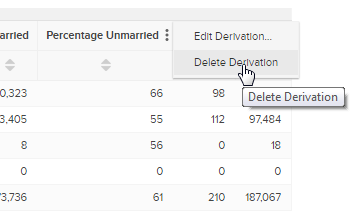
To remove a derivation, click the menu next to the item in the table and select Delete Derivation.
