Grouping Tool
Use the Grouping tool to create groups of fields and change the order the fields display in the SuperSTAR clients.
This can be particularly useful when your database contains a large number of fields. It does not change the structure of the database, but can make it much easier for users to navigate the available fields.
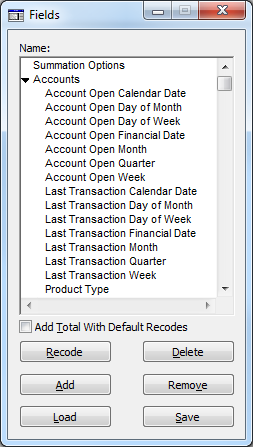
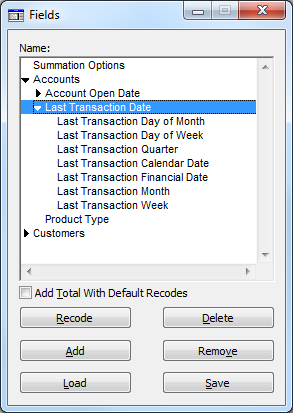
For example, the following screenshots show the Accounts table in SuperCROSS with and without groups:
In this example there are no groups:
This example has groups for the fields relating to account opening and the last transaction:
To display the Grouping tool, click the icon on the toolbar:

There are a number of changes you can make using this tool:
| Reorder Fields and Measures | Drag and drop an item to change its location in the list. The order of fields, measures, and groups shown here is the order that they will appear in the clients. |
|---|---|
| Sort Everything into Alphabetical Order | Right-click and select Sort. All items will be sorted into ascending alphabetical order (this action applies to the entire database, not just the selected items). Any items in groups will be sorted alphabetically within the group, and the groups themselves will be sorted into alphabetical order. When using the Sort option, any groups with no contents will automatically be deleted. |
| Create Groups | Right-click and select Add Group to create a new group at that location. If you clicked on an existing group then the new group will be created as a sub group, otherwise it will be created below the item you clicked in the list. The new group will initially have a default name like Group0, Group1, Group2, etc. You can rename the group: simply click the group in the list and then type your new group name. |
| Move an Item into a Group | To move an item into a group, drag and drop the item onto the group name, making sure you hold down the Ctrl key as you drop the item (if you do not hold down Ctrl, the item will be reordered and placed below the group in the list instead. You can also move multiple items into a group: either hold down the Shift key to select a range or use the Ctrl key to select multiple non contiguous items, then drag and drop them onto the group name (make sure you hold down Ctrl as you release the mouse button to add them to the group). |
| Delete a Group |
|
Any changes you make will not take effect in the SuperSTAR clients until you rebuild the target database.
Move an Item into a Group
To move an item into a group you must hold down the Ctrl key when dragging and dropping:
- Click and start to drag the item.
- Hold down Ctrl. The mouse pointer changes to show a small + icon.
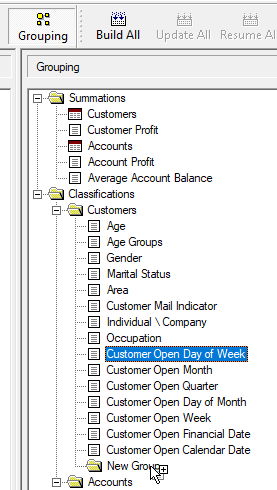
- Drop the item onto the group name, while still holding down Ctrl.
If you do not hold down the Ctrl key when dragging and dropping the item, it will be reordered in the list instead and placed below the group in the list.
Change Field Labels
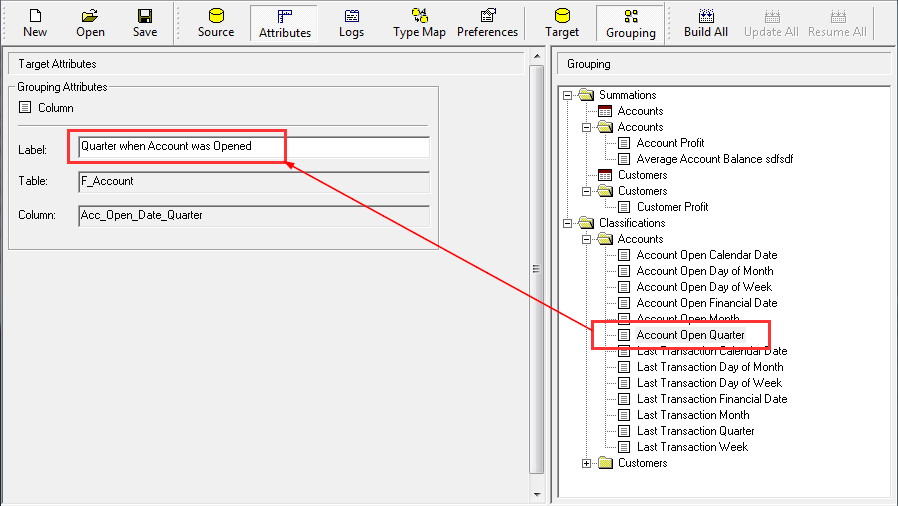
You can also use the Grouping tool in conjunction with the Target Attributes pane to change the labels of the fields and measures in your database.
Click the Attributes icon to display the Target Attributes pane alongside the Grouping pane. You can then select an item in the Grouping tool and change the label for that item in the Target Attributes pane:
Reset Grouping
You can use the Reset Grouping option on the right-click menu to revert to the default grouping.
This will revert to the current default grouping setting for this database. All items will revert to the default order and any groups you have created will be deleted.
This change only affects the order of items and the group hierarchy. It will not revert any label changes you may have made.
The default group setting is defined at the database level. It will be one of the following:
- Flat - Summation options and fields will be added to the Summations and Classifications groups in a flat structure.
- Hierarchy - Summation options and fields will be grouped together within the Summations and Classifications groups based on the fact table they belong to.
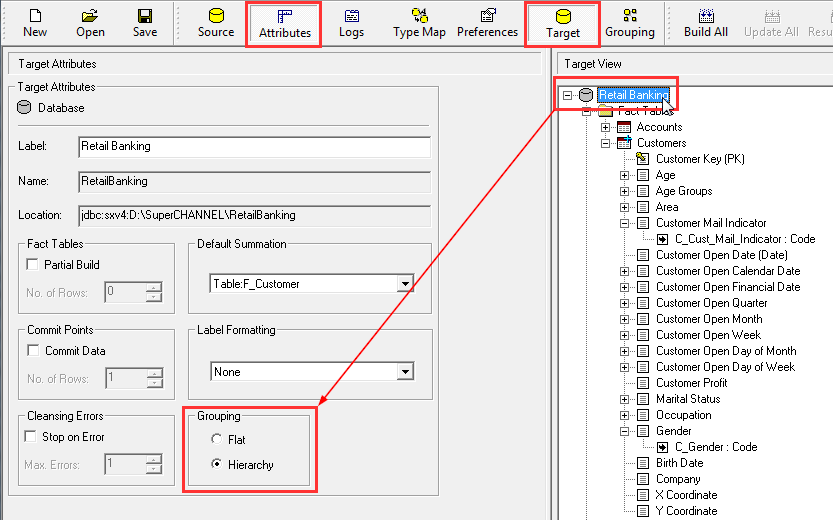
You can check and change the default grouping for this database by selecting the Target and Attributes panes, and selecting the database in the Target View:
