This section describes how to use the SuperWEB2 client and the supplied sample data to validate a new installation of SuperSTAR Suite.
The validation process involves the following steps:
Step 1 - Check the SuperSTAR Windows Service is Running
-
Open the Windows Control Panel.
-
Select System and Security > Administrative Tools and open Services.
-
Locate the services SuperSTAR and SuperWEB2 and check that they have the Status of Started, which indicates that they are running:

If the services are not running, right-click them and select Start.
Step 2 - Open SuperWEB2 in a Web Browser
-
Open a web browser and go to http://localhost:8080/webapi
-
Login to SuperWEB2 using the default user credentials:
-
-
Username: user1
-
Password: user1
-
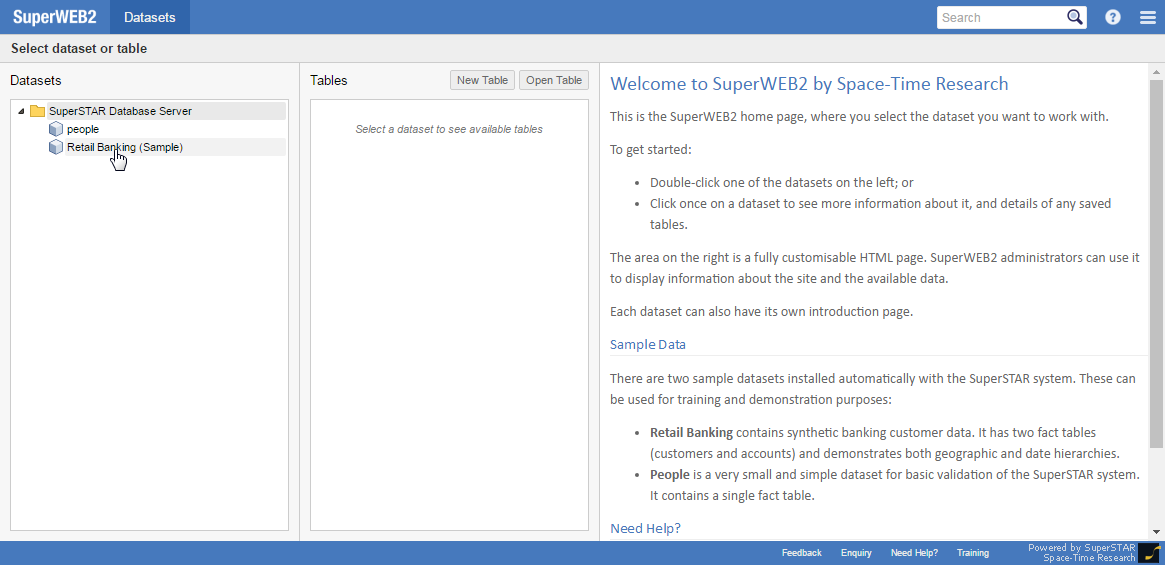
Step 3 - Select Retail Banking
The data catalogue displays. Double-click the Retail Banking dataset.
Step 4 - Create a Query in SuperWEB2
Add one of the fields to the columns and one of the fields to the rows.
For example:
-
Click the folder next to Customers to expand it.
-
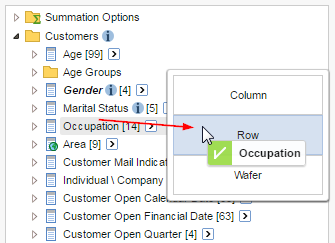
Click and drag the Gender field towards the table. SuperWEB2 displays the Column, Row and Wafer drop zones.
-
Drop the field onto Column.
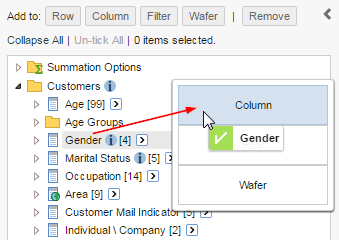
SuperWEB2 adds the Gender field to the column headings:
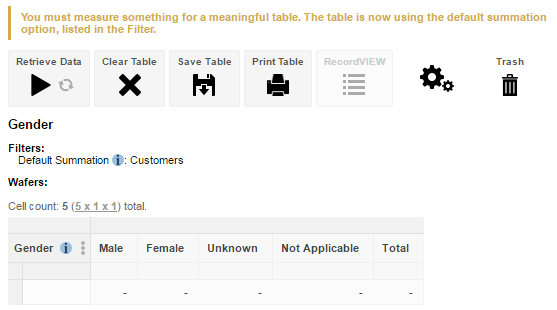
-
Drag the Occupation field and drop it onto Row:
-
Click Retrieve Data and verify that cross tabulation results display in your browser:
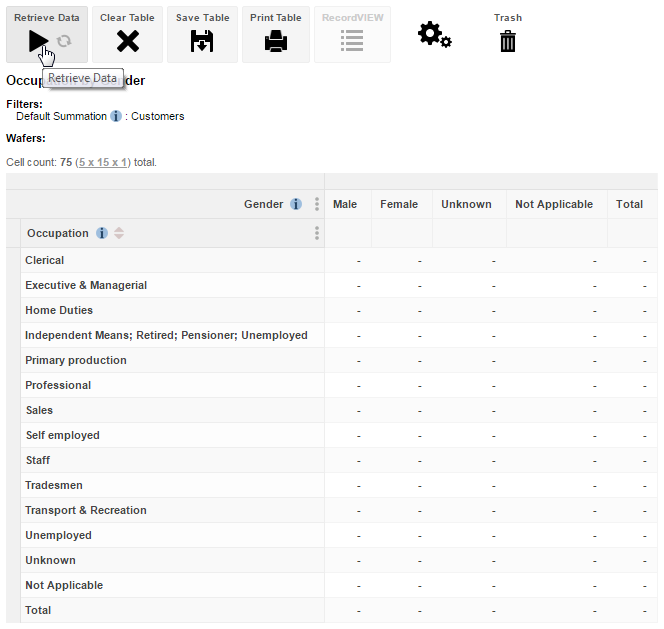
If you see some results then this verifies that SuperWEB2 and SuperSERVER are working.
Step 5 - Open SuperCROSS and Set Up the Server Connection
-
Go to the Windows Start Menu and select SuperSTAR > SuperCROSS > SuperCROSS.
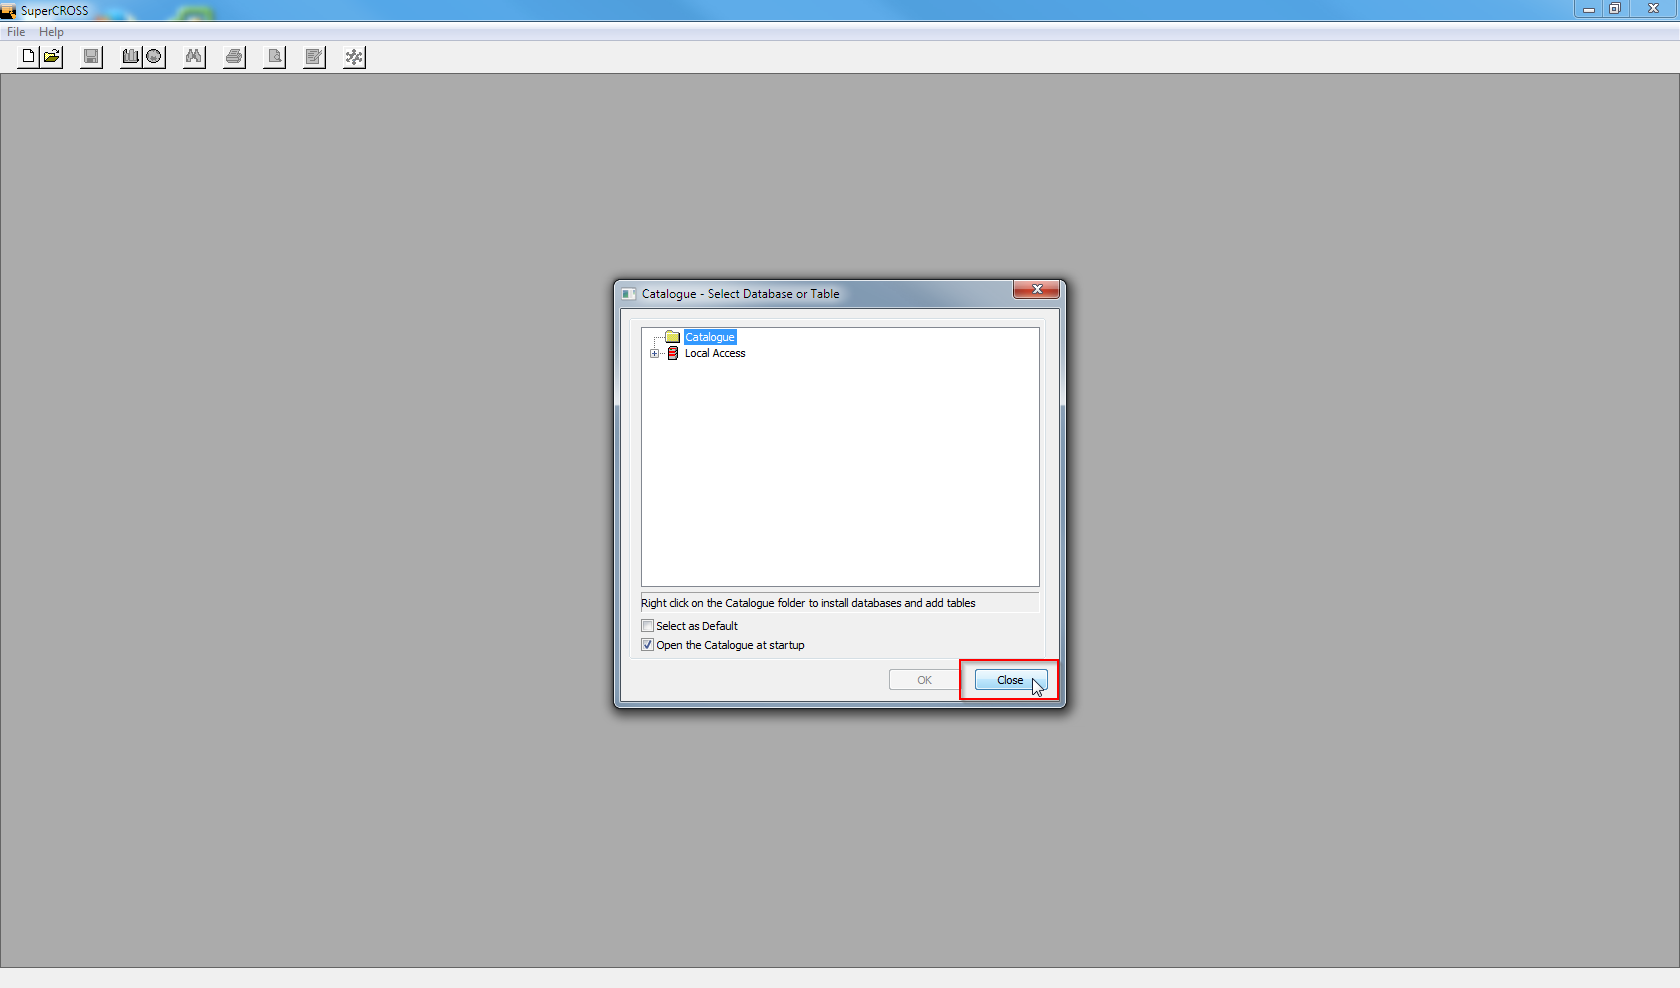
SuperCROSS starts, and displays the Catalogue window. This window allows you to select the dataset you want to connect to.
However, before you can select a dataset for the first time, you need to set up the dataset connection to the server.
-
Click Close on the Catalogue window.
-
Select File > SuperADMIN Connection. The SuperADMIN Connection window displays.
-
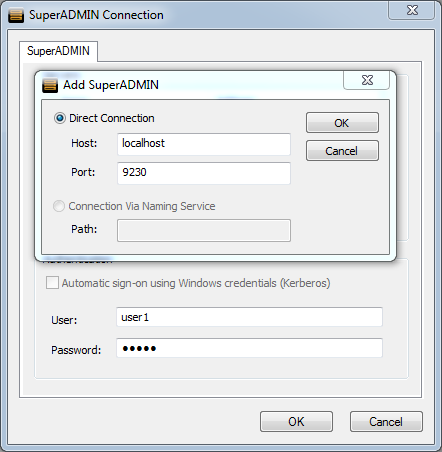
In the Authentication section, enter the default user credentials (user: user1 and password: user1) and then click Add.
The Add SuperADMIN window displays.
-
Accept the default values (localhost and port) and click OK.
-
Click OK to close the SuperADMIN Connection window.
Step 6 - Select a Dataset
-
Select File > New. The Catalogue window displays again.
-
Expand SuperSTAR Database Server.
-
Double-click Retail Banking to open it.
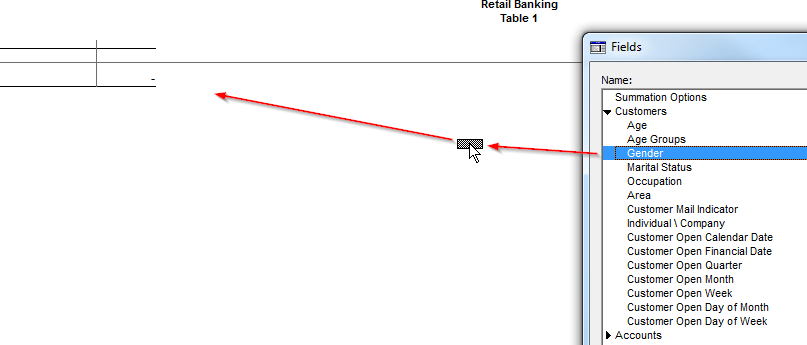
Step 7 - Create a Query in SuperCROSS
-
In the Fields dialog, expand the Customers group.
-
Select Gender and drag it to the rows in the workspace.
-
Select Occupation and drag it to the columns.
-
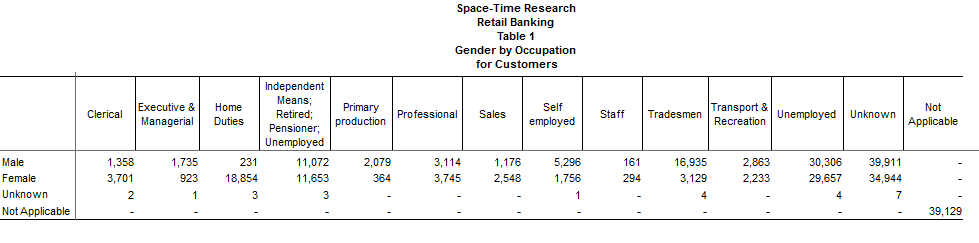
Click the GO button on the toolbar:

You should see some sample results appear in the table.
This indicates that SuperCROSS is working and the connection to the server is configured correctly: