Getting Started - SuperCROSS
This section is designed to help you get started with SuperCROSS. It shows how to launch the client and start creating tables with the supplied sample databases.
Launch the application either by clicking the icon on your desktop:

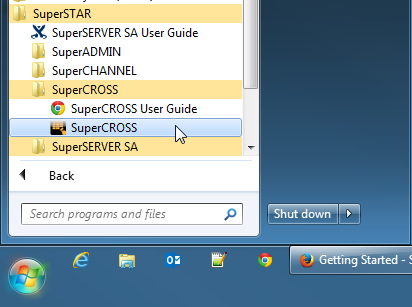
Or by selecting the SuperCROSS option from the Windows Start menu:
The SuperCROSS client displays:
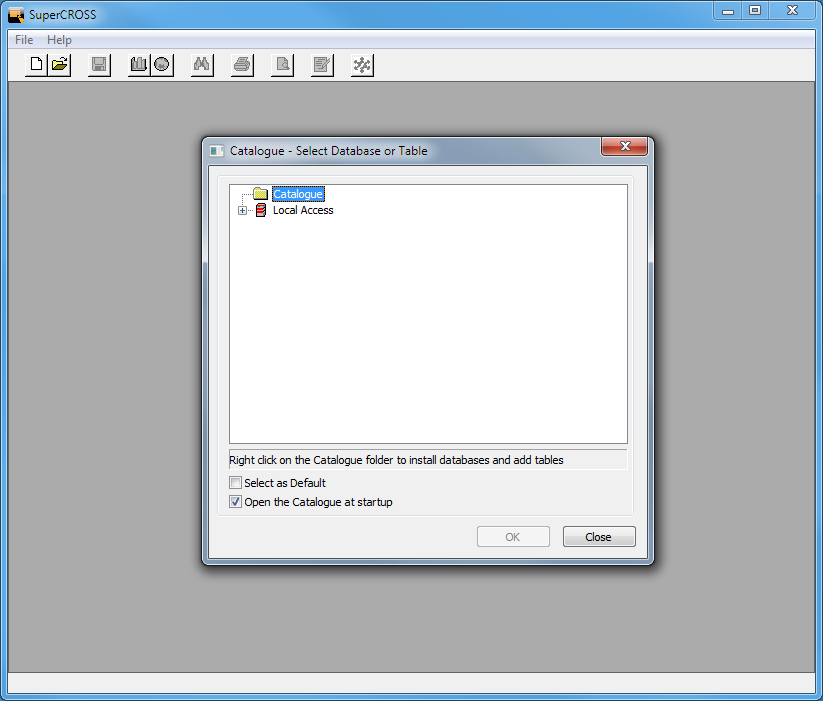
Select a database from the list.
Unless your client has already been configured to connect to a SuperSERVER, you will initially only have access to the sample databases.
To try SuperCROSS with one of the sample databases:
- Double-click Local Access.
- Double-click Examples.
- Double-click Retail Banking (SXV4).
SuperCROSS opens a blank table based on the sample Retail Banking database. This is a synthetic set of data supplied with the software for demonstration purposes.
The Fields window displays all the available fields:
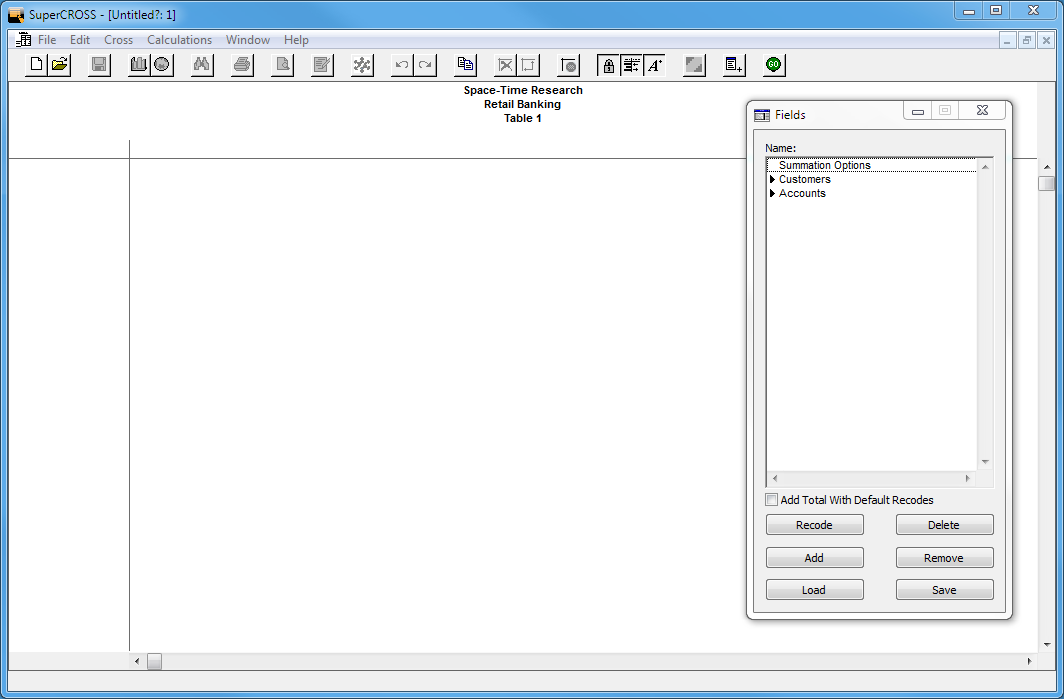
Now that we have connected to a database, we will create a table and perform a cross tabulation:
- Click the arrow next to Customers to expand the list of available fields:
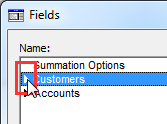
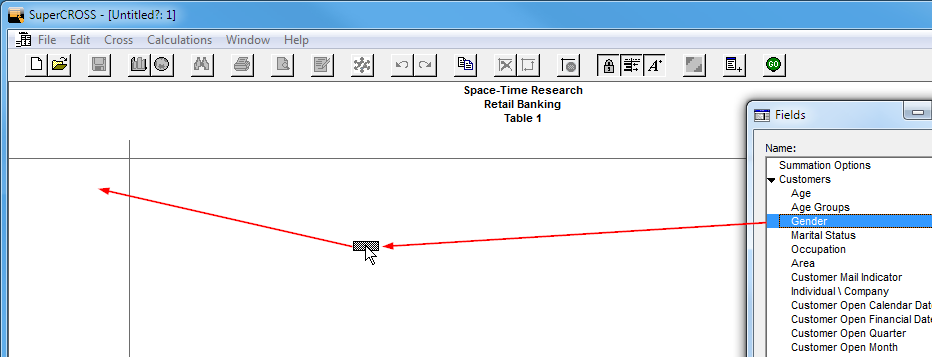
- Click and drag one of the available fields and drop it onto the rows of your table. For example, Gender:
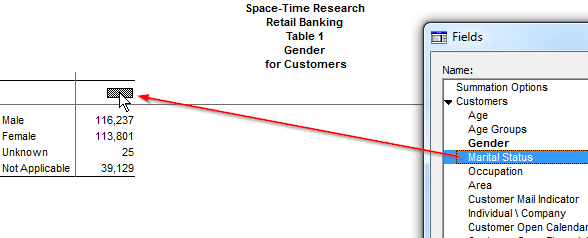
- Click and drag another field across to the columns. For example, Marital Status:
Depending on how your client is set up, SuperCROSS may automatically perform the cross tabulation when you add the fields (i.e. it might automatically retrieve the results and show figures in the table).
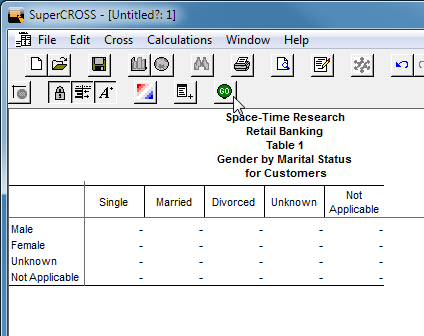
If there are no figures in the table, click Go:
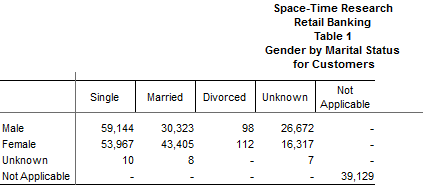
SuperCROSS performs the cross tabulation and displays the results:
You can control whether or not SuperCROSS automatically performs the cross tabulation. Select Cross > Autorun to toggle this setting on or off.
- Click the arrow next to Customers to expand the list of available fields:
- Now we will add a third dimension to our table:
Click and drag another field to the top-left corner of the table. For example, Area:

SuperCROSS adds a third dimension to the table (known as a wafer):
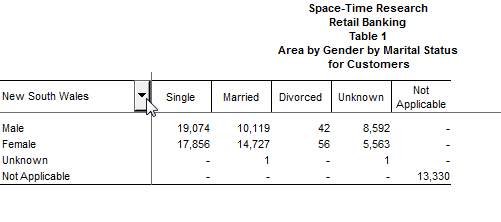
In this example, we have added the Area field to the wafer. You can use the drop-down list to show results on a per-state basis.If you do not have Autorun turned on, you need to click Go every time you change the table to run the cross tabulation and see the updated figures.
Now suppose you have changed your mind and want to see some different fields in the table. To remove a field from the table, simply drag it back to the Fields window.
For example, click anywhere on the column headings and drag back to the Fields window:

SuperCROSS removes the column heading from the table.
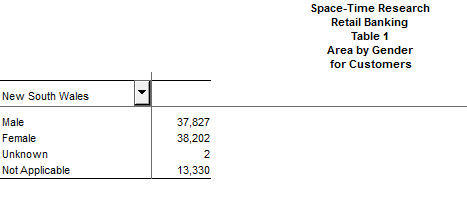
Try dragging other fields to the column headings or rows.
For example, try dragging the Occupation field onto the column headings:

You can create more complex tables by having multiple fields on the column or row headings at the same time.
For example, try dragging the Marital Status field across to the rows. SuperCROSS shows both Gender and Marital Status together on the rows:
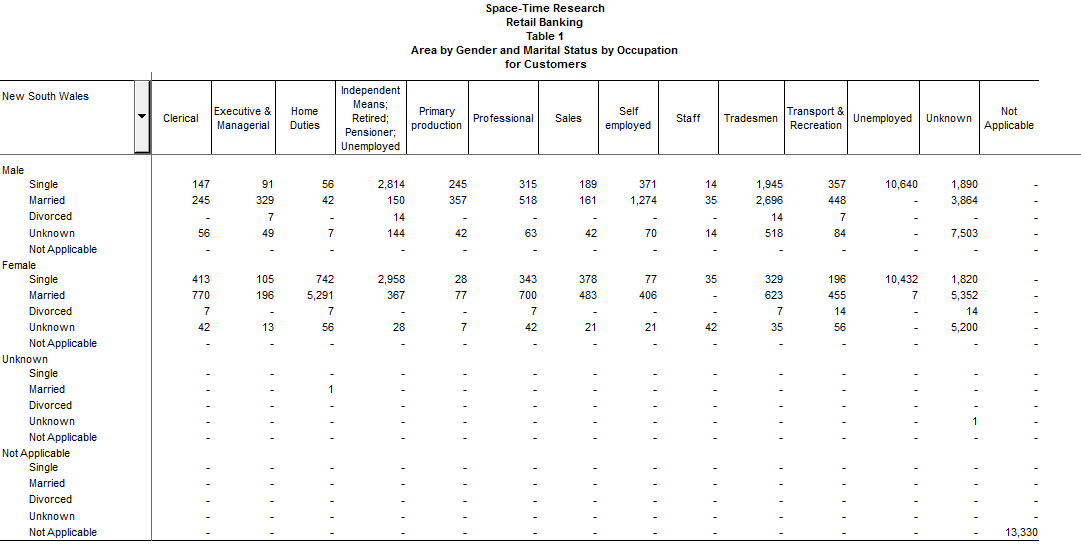
This section has introduced some of the basic SuperCROSS concepts. You have successfully launched SuperCROSS, created a table, and performed some basic cross tabulations.
Next Steps...
- This example used the supplied sample data. Learn how to connect to a SuperSERVER database.
- Read the overview to learn more about the SuperCROSS interface.
- Learn about:
