
These instructions explain how to set up SuperSTAR when you want to install SuperSERVER and SuperADMIN on different machines.
Windows
Step 1 - Install SuperSERVER
The first step is to run the SuperSERVER installation process:
-
Go to the machine where you want to install SuperSERVER and launch the SuperSERVER installer.
-
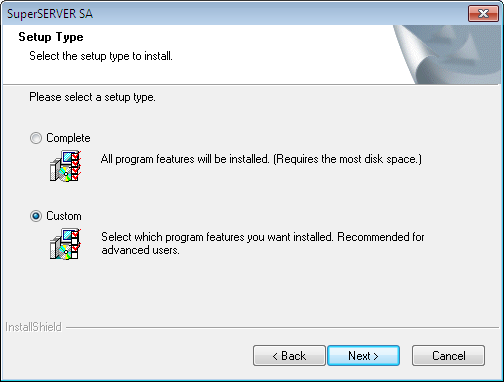
Click through the options as if you were doing a standard installation until you get to the option to choose a Complete or Custom install.
Choose the Custom installation:
-
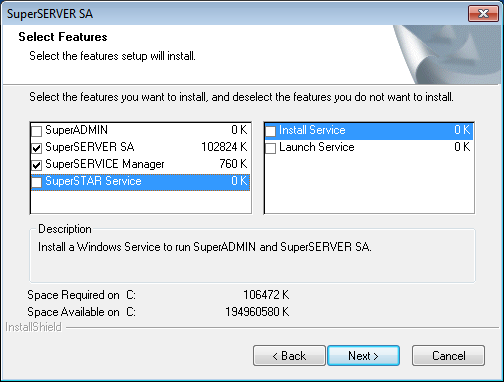
When you are prompted to select the components to install, deselect SuperADMIN and the SuperSTAR Service:
-
Complete the rest of the installation process.
Step 2 - Install SuperADMIN
-
Go to the machine where you want to install SuperADMIN and launch the SuperSERVER installer.
-
Click through the options as if you were doing a standard installation until you get to the option to choose a Complete or Custom install.
Choose the Custom installation:
-
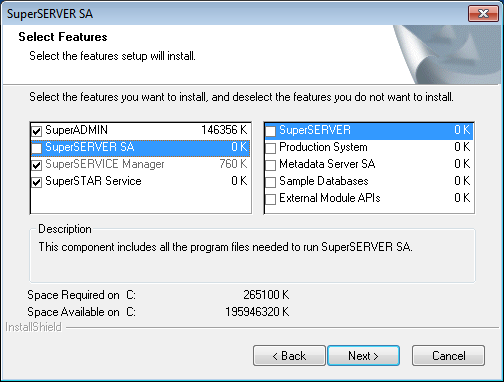
When you are prompted to select the components to install, select everything except SuperSERVER SA:
-
Complete the rest of the installation process.
Step 3 - Configure SuperSERVER to Connect to SuperADMIN
The final step is to configure SuperSERVER so that it connects to the SuperADMIN server running on the other machine (by default, SuperSERVER will attempt to connect a SuperADMIN server running on the same machine as SuperSERVER).
-
Go to the machine where you installed SuperSERVER.
-
Start SuperSERVICE Manager.
-
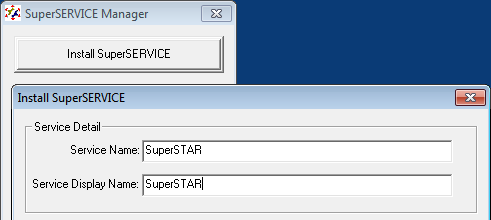
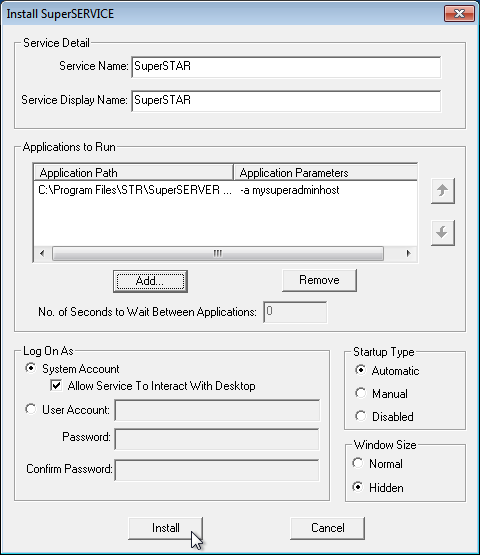
Click Install SuperSERVICE.
-
In the Service Name and Service Display Name fields, enter SuperSTAR.
-
In the Applications to Run section, click Add. The Add Application window displays.
-
In the Application Path, click the browse button and select the SuperSERVER executable. If you kept the default installation location, this will be located at C:\Program Files\STR\SuperSERVER SA\scsa.exe
-
In the Application Parameter field, enter -a <host> (replace <host> with the hostname or IP address of the server where you installed SuperADMIN).
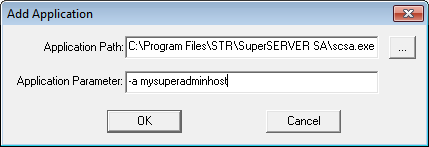
If your SuperADMIN server is running on a non-standard port, you must specify that here too, e.g. -a mysuperadminhost:9000
-
Click OK on the Add Application window.
-
Leave all the other options set to the defaults.
-
Click Install.
-
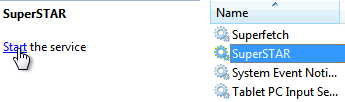
Go to the Windows Services console and start the SuperSTAR service.
Step 4 - Verify the Installation
Follow the steps under Verify the Installation below to verify that SuperSERVER and SuperADMIN are set up correctly and communicating with each other.
Linux
Follow these steps when using Linux:
-
Obtain the installation package. SuperSERVER and SuperADMIN for Linux are supplied as a single compressed file. It will be named something like SuperSERVER_SA-Linux-x86_64.9.0.0.tar.gz.
-
Copy the compressed package file to both machines, in the location where you want to install SuperSERVER and SuperADMIN, for example /opt/
-
On both machines, open a terminal, change to the directory where you saved the SuperSERVER file, and use commands similar to the following to extract the contents:
Bashgunzip SuperSERVER_SA-Linux-x86_64.9.0.0.tar.gz tar -xvf SuperSERVER_SA-Linux-x86_64.9.0.0.tarThe files will be extracted to an STR sub directory. For example, if you copied the file to /opt/ then the SuperSERVER files will be extracted to /opt/STR/
-
Start SuperSERVER and SuperADMIN as follows:
-
On the SuperADMIN machine, navigate to STR/SuperADMIN/server and run the command
./server.sh -
On the SuperSERVER machine, navigate to STR/SuperSERVER_SA and run the command
scsa -a <superadminhost>(where<superadminhost>is the hostname of the machine running SuperADMIN).
To run SuperADMIN server and console, you must ensure that a suitable version of Java is available in your PATH.
-
-
Follow the steps under Verify the Installation below to verify that SuperSERVER and SuperADMIN are set up correctly and communicating with each other.
Verify the Installation
You can verify that SuperSERVER and SuperADMIN are set up correctly and communicating with each other by doing the following.
Check the SuperSERVER Log File
On the machine where you installed SuperSERVER, check the SuperSERVER log file.
-
On Windows, if you kept the default installation locations, the log file will be stored in C:\ProgramData\STR\SuperSERVER SA\logs\scsa.logs.txt
-
On Linux, the log file will be stored in STR/SuperSERVER_SA/logs/scsa.logs.txt wherever you extracted the installation package.
If SuperSERVER has successfully connected to SuperADMIN, the log file will contain lines similar to the following:
10:04:20 2013/08/21, INFO, AUDIT_DataServer, "Attempting to register with Administration Server [mysuperadminhost:9230]"
10:04:20 2013/08/21, INFO, AUDIT_DataServer, "Connected!"
Check SuperADMIN
On the machine where you installed SuperADMIN, login to the SuperADMIN Console and use the command server to check that your SuperSERVER has connected to SuperADMIN and registered itself. On Linux, you can start the console by running STR/SuperADMIN/console/console.sh
You should see output similar to the following, confirming that SuperADMIN is connected to your server and it is running:
> login user1 user1
User 'user1' logged in
> server

[ Default Metadata Configuration       (id:defaultmd)              (uri:\\localhost:8005)  ]
[ SuperSERVER mySERVER                 (id:mySERVER)               (RUNNING)     (uri:\\mySERVER:9232)  ]
[ Default Configuration                (id:default)                (uri:\\localhost:9232)  ]